Friday, 13 February 2015

Anatomy of a Brooch


These brooches are part of a small collection of jewellery pieces I made for the Rijks Studio project. The Rijksmuseum unloaded a large part of their collection to the internet and then encouraged artists to use the images in their work.
Who could resist that generous offer !!


I decided to combine the wonderful Renaissance portraits of very strong and imposing ladies with the texture of quality Donegal tweed.
I decoupaged the paper prints onto black wood and sealed them. Then I choose a mix of ceramic beads, seed beads and some Czech glass flower beads to attach the portraits to the padded tweed.


The tweed is ‘fringed’ to give a country style look and the brooches are backed with felt.
Little historic portraits to pin on a coat !


Tuesday, 10 February 2015

Wild Garden Embroidery


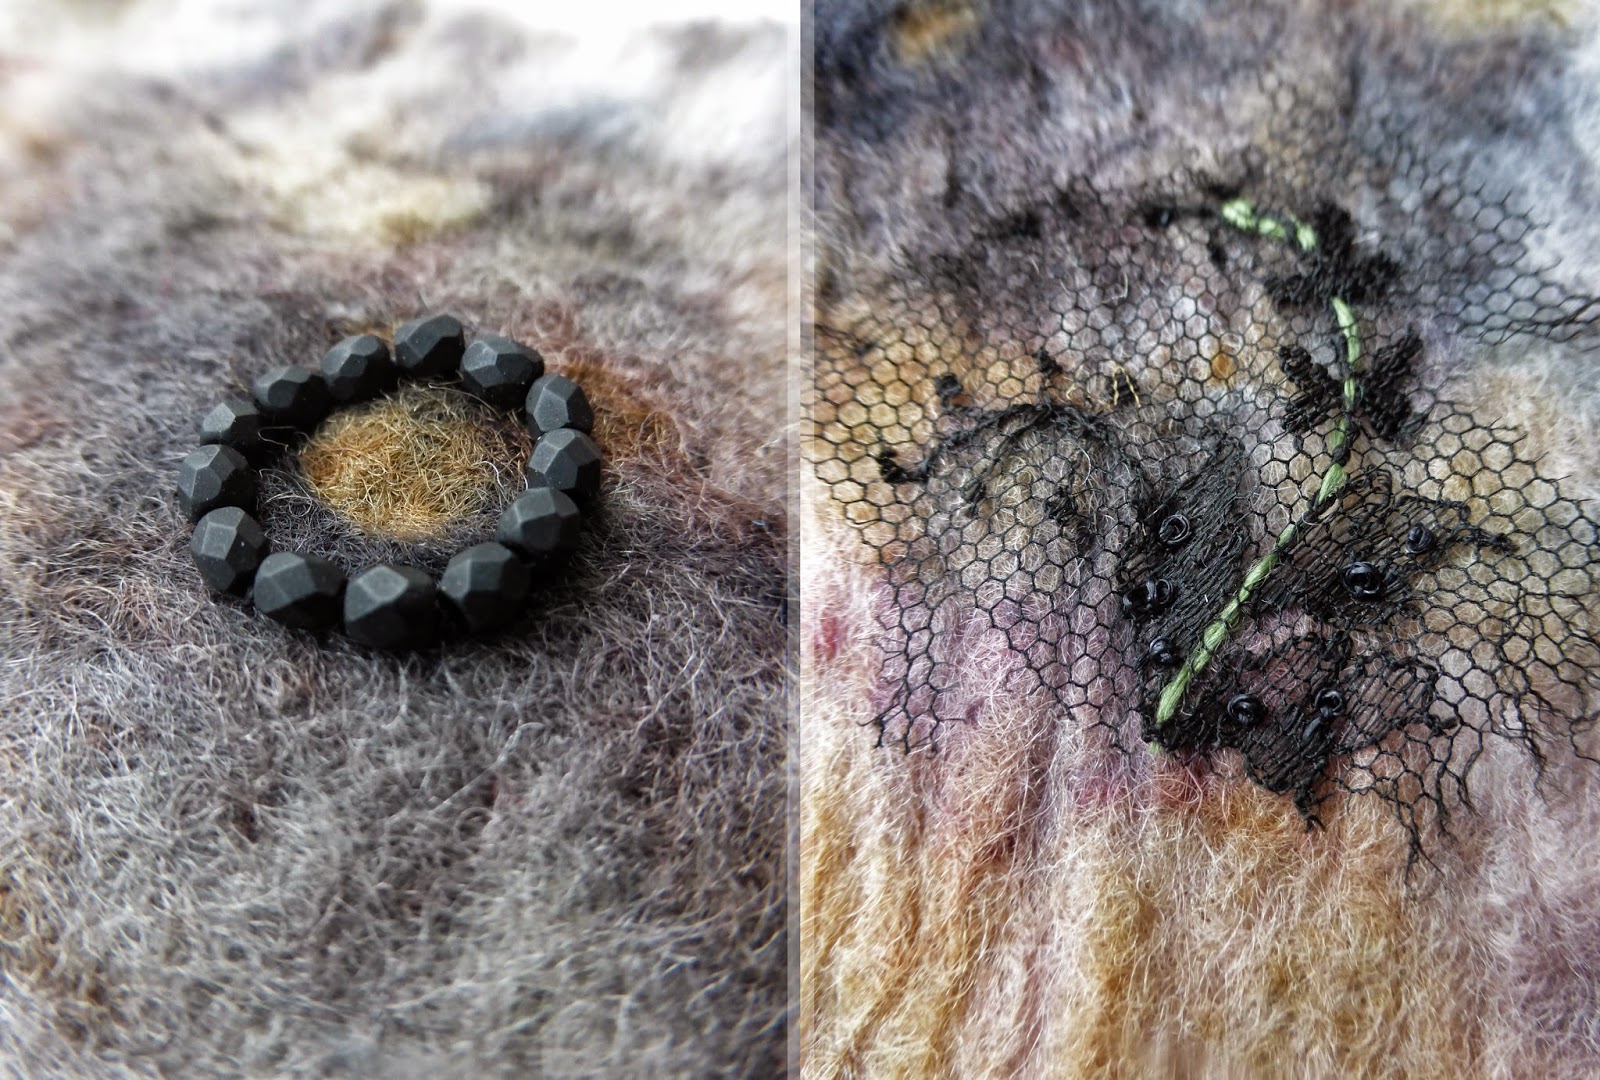
Here I used some wonderful 3mm thickness felt that is a dream to stitch on. It took the eco dye of petals and rusty keys beautifully and already looked like a wild garden before any embroidery threads were added !


I have included some black Victorian lace c1890 and vintage wooden buttons to add some history. I attached matt black beads as a dark contrast and for depth.


Hand dyed sari silk ribbon became roots and greenery with inner seed pod French knots within the folds.  I twisted the silk and frayed here and there.


I choose rich deep colour threads, purples, pinks, lavender, berry shades.


The end result is quite dark and a little mysterious, the flowers are not any particular varieties - but wilder and untamed.
Well that’s my story !!!

Monday, 9 February 2015

Eco Dyeing


This is by no means a tutorial - I am only at the experimenting stage myself.
There are many experts writing in blogs and there are beautiful books on the subject.
This is just my playful and fun attempts!!
I was first prompted to try this form or dyeing having seen the amazing work of India Flint. I am starting with baby steps, to test a few pieces and mainly to have backgrounds for my embroidery and textile art.
I choose to try dyeing with rose petals, eucalyptus leaves .  .  .  and  because I love dark shades .  .  . some rusty keys (take care when using these - don’t lick your fingers!)
(1) Choose the Eco Dye
First have a look at what you have in your garden or if like me you have no garden, find a friendly florist who might sell off or kindly give discarded blooms or cuttings.                                                                    
Gather petals and leaves, darker colours give richer stronger shades. There are lists and colour charts of what’s achievable from various flowers, vegetable skins and leaves to be found on the internet and in the  ‘must have’  books like Eco Colour by India Flint or Colours from Nature by Jenny Dean.
Impatient me just jumped in and winged it with these pieces !!


(2) Choosing the fabric.
I found that silk and felt took the colours best. (Cotton / scrim etc were more hit and miss.)
I soaked the fabric pieces in water with a little vinegar for about an hour. But there are other ‘fixatives’ you can use to attract the dye.
(3) Design a layout.
I then put down waterproof covering on my table (oil cloth or a black bag) and laid out my fabric flat. I arranged the petals / leaves / rusty keys and then rolled into bundles. I found that a thick branch or piece of wood was good to start the rolling. Then I wrapped and tied up with twine. (if you tie up with white or cream cotton knitting wool you get that dyed as well !!)


(4) Steaming.
Next I steamed for 3 hours. I bought a large saucepan to use just for this purpose.


(5) The hard part - waiting.
Allow to dry completely - may take 3 days - 1 week.


(6) The best bit - unwrapping.
Unwrap - pull away all the petals and leaves (dry and keep keys for next time) Iron if you want a flat look and to seal the colours more.


(7) Results.
Then think of what you are going to do with these unique fabrics.

Such fun to do - always a surprise result !!


Thursday, 21 February 2013

Introducing Madrigals . . .

'Madrigals' are unaccompanied vocal composition popular during the Renaissance ; a piece for several voices set to a short poem, usually about love. They express the emotion contained in each line, and sometimes individual words.

I have wanted for a long time now to try making a series of collections -  pieces, linked by style and ideas, even though they were often quite individual. This collections of cuffs, art pendants, brooches, earrings and amulets will be grown and named Madrigals. I picked the name ‘Madrigal’ for my collection of Renaissance art cuffs and jewellery because it represents the individual elements that combine to celebrate that richly elaborate era.

My Renaissance ladies will be adorned with rustic ceramic beads and delicious Czech picasso glass, a little Victorian lace, a little embroidery and lots and lots of love.

Here are some ladies in waiting . . . .


I have picked Renaissance portraits as they are so deliciously dark and moody.  A celebration of deep colours and use of light. I have tried something new this time to add to my fabric jewellery- lovely wooden beads and some decoupage. I printed and sealed the images onto wood and then played with adding antique lace and acrylic paint sheen to the mix. I have to admit I am indulging myself in picking mixtures of gorgeous rustic dark ceramic beads and Czech picasso glass beads - such amazing beauty - so hard to resist.

Here is the style of cuff I have started with. I just added some to my etsy shop today.


Other pieces are in the form of textile amulets.
Some pieces of teased out vintage cotton fabric combined with deep purple felt. I knitted some yarn and then felt embellished and finally cut and embroidered - trapping silk fibers of deep rich shades. All of the pieces are bound together with threads and make a light sturdy pendant. 
I thought immediately of an amulet - worn for luck and protection. The beads added were chosen to reflect the Renaissance style where rich dark beaded jewellery was seen in portraits of the era.


The pendants also echo the style with portraits on wood and selections of wired stacked beads.


I hope to be adding brooches and earrings soon to my Madrigals.

Sunday, 2 December 2012

Two Whimsical Pendants

Two Whimsical Pendants

I have added two  ‘old/new’ pendants to my etsy shop.

The focal point for the first pendent is love of antique buttons!!

I wanted to have a pendant celebrating the beauty of Victorian buttons - each one special.

I choose a wonderful round Victorian brass button from c1870.
Then hanging from that I put a most unusual late Victorian c1900 button.
It is a drop shape - it could have been opened but I have sewn it shut.
It is so distinctive - anyone know the reason or history for this type of button - I would love to know?
I added two apple green wood beads, some moss green seed beads and some metal beads to hand the button.
They sit on platted green silk ribbon that is attached to a divided 18inch bronze plated metal chain.

For both of these pieces I cut the chain and extended with ribbon - just wanted to try a less formal look. Whimsical with a historic Victorian twist !
One of a kind.


The second pendant is called - Fly Birdie

Another  ‘old/new’ piece - just like memories are.

A blue distressed platted silk ribbon is again attached to a divided 18inch bronze plated metal chain with blue seed beads twisted around the tie knots.
A little collection hangs from the ribbon.
A bronze bead cap (lovely open work) holds some more ribbon, some Victorian lace and a small bird charm. 
On more blue seen beads hangs more Victorian lace and an antique watch key. (on one side a flower, on the other number 7). A nice pretty key - small enough to be delicate.


See them both on etsy

https://www.etsy.com/listing/116908530/antique-button-love-pendant

https://www.etsy.com/listing/116910316/fly-birdie-pendant

Thursday, 29 November 2012

Embroidered Buttons

I have been having fun making more buttons !!
I blogged in July about my first buttons for my etsy shop.
I have since made some more and now I don’t want to stop!

Buttons really are little mini embroideries and can be added to so many things,
tops, dresses, bags, scarfs, slippers, art . . . . 

For these I have used cotton thread embroidery, mostly on linen as it is so nice to work with. I added some lace, antique Victorian + 1910, vintage 1920’s + 1930’s to add the history. I am in a  ‘French Knot’  phase at the moment - so they appear everywhere !

I first give myself the button size guidelines - drawn with a fabric marker (that is invisible in a day). Then I embroider that outline (because I don’t always finish before the ink disappears!)                            
I set up the Linen in an embroidery frame and picked my lace and threads.


Here are some photos taken as I worked.


Then I carefully cut to the edges and made the buttons onto metal backings.
I found it best to have a layer of interface backing so that the shine of metal does not show through. So this is my latest little batch.


I have put them onto cards in two and threes for etsy.
Such fun - a capsule collection.


More styles soon - I am hooked !

Wednesday, 3 October 2012

Making a Fabric Flower Bouquet

My First Fabric Flower Bouquet !
A very special couple just had a wonderful celebration - namely a 60th wedding anniversary - a truly great occasion. . . wow. !!
I wanted to make a personal anniversary gift and decided on a mini bouquet.    
As I was travelling to the event I was not sure how fresh the flowers would be on arrival so decided I would try my very first fabric bouquet.
Here is how it went !!
I looked at some complex and some simple styles on web and then there was lots of making it up as I went along.
I can tell you it does take a bit of preparation and some time but it is such a fun thing to do.

(1) Cut and singe
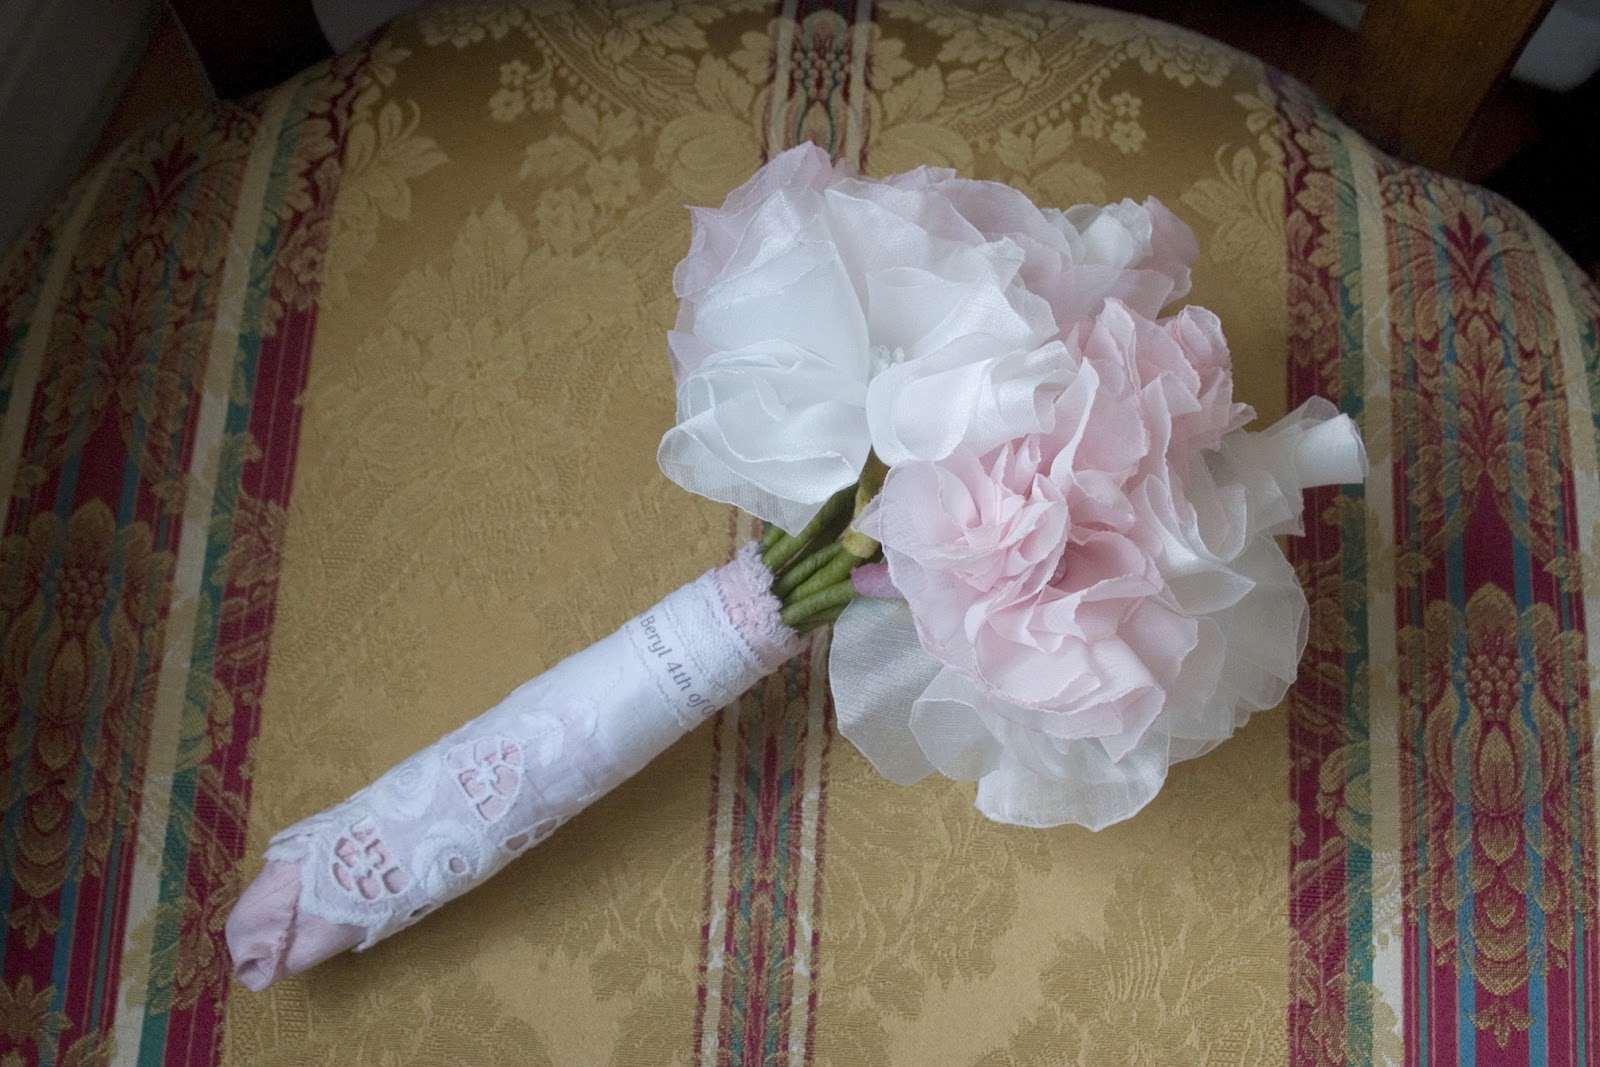
I bought some chiffon in white and some in pale pink and cut lots of circles - approx  6 inches diameter. You don’t have to be too careful with exact shape of circles.
But patience is needed for next stage - carefully singeing all around each circle - just heating enough to seal but not burn - not so easy. If you do burn a little - just cut off that piece of black and singe again. I found the easiest way to do this is over a candle.


(2) Making the flowers.
I folded and gathered a circle -  loosely sewing at the end  - four of these together made the flower size I wanted.


(3) Stem
I used hobby/florist wires for the stems.
I bent the wire and sewed on the flower and then to soften the stem and give a little body I used padding - just wrapping thread around to hold.  I finished off by wrapping with green florist tape. At tops I added some dyed silk petals - looks pretty and also helps secure the flower neatly.


(4)
For centers of flowers I picked nice white / pink fabric sewn around padding into little balls. The detail is made by embroidering knots with white cotton yarn and then lots of seed beads. ( I find it hard to make anything without adding seed beads !! )


(5) Wrap
I wrapped the bouquet with 1940’s white open work lace and at top added 1920’s thin lace. I printed the wedding date on cotton as a final touch.


The individual flowers can then be adjusted  - fluffed up - tweeked until it looks done !!


There are so many amazing fabric bouquets to be seen on the web - I am in awe at the detail and beauty of them. There are many ways to make one - mine is just my idea of how to go about it. 
It turned out a light bouquet to hold  - just what I wanted to make - and I learnt a lot making it !!